
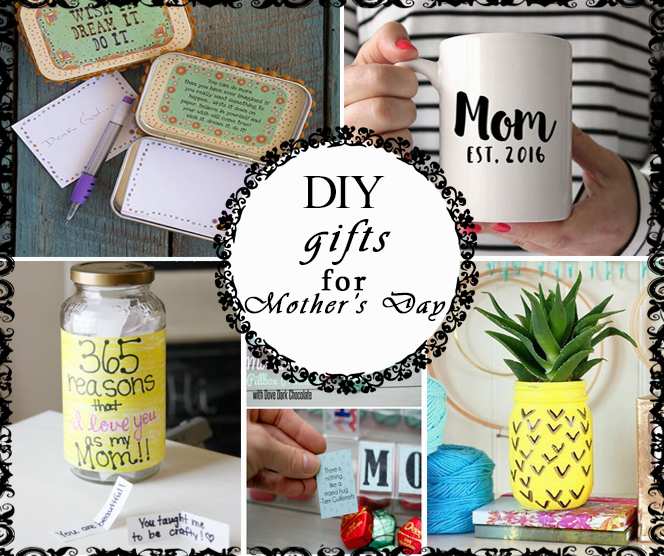
04 May DIY tips for cool and heartwarming gifts on Mother’s Day
source: Pinterest.com
In celebration of Mother’s Day this coming May 14, 2017, we are excited to share today’s post with all of you on how to honor everybody’s mother out there.
Sometimes, it is hard to think of gift ideas for our Moms right? However, the best way to melt your mom’s heart is to give her something you made for her on your own. They will for sure, appreciate gifts that are made personalized by you and not the expensive ones that are bought from stores because they know how much time and effort you spent just to give them something special.
Below are some DO IT YOURSELF gifts you can give to your mom. These gifts are easy to make and are made out of scraps which means you don’t need to spend a penny or two.
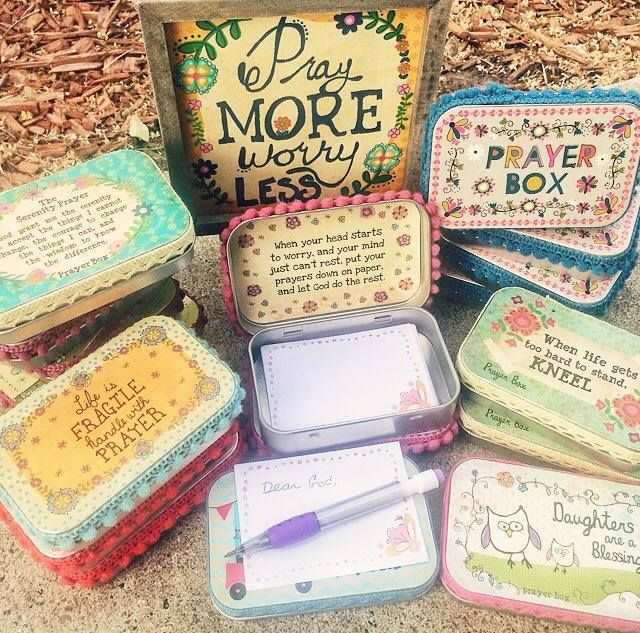
- PRAYER BOX
Source: Pinterest.com
For those who have moms out there who are religious and always find the time to pray, this is for you. She can write her prayers on the pieces of paper and is one incredible way to pray.
Materials:
> 1 empty mint tin
> craft papers
> glue gun
> glue stick
> colored pens
> clear gloss varnish (optional)
> spray paint (optional)
stickers (optional)
Procedure:
- spray paint on the empty mint tin according to your desired color to cover up the initial color and anything that is written on the tin. Let it dry.
- with a piece of craft paper, you can write or print “prayer box” on it and cut it out for the top of the box
- stick the paper on top of the box with a glue gun and glue stick
- with another piece of paper, you can write or print any prayer you like and cut it out for the inside cover of the tin. Make sure that the paper fits inside so your paper won’t get crumpled or messed up.
- stick the paper inside
- cut out pads of paper to put inside the prayer box
- you can also add stickers
- you can also polish the mint tin (using a clear gloss varnish) after to protect your art work from possible scratches
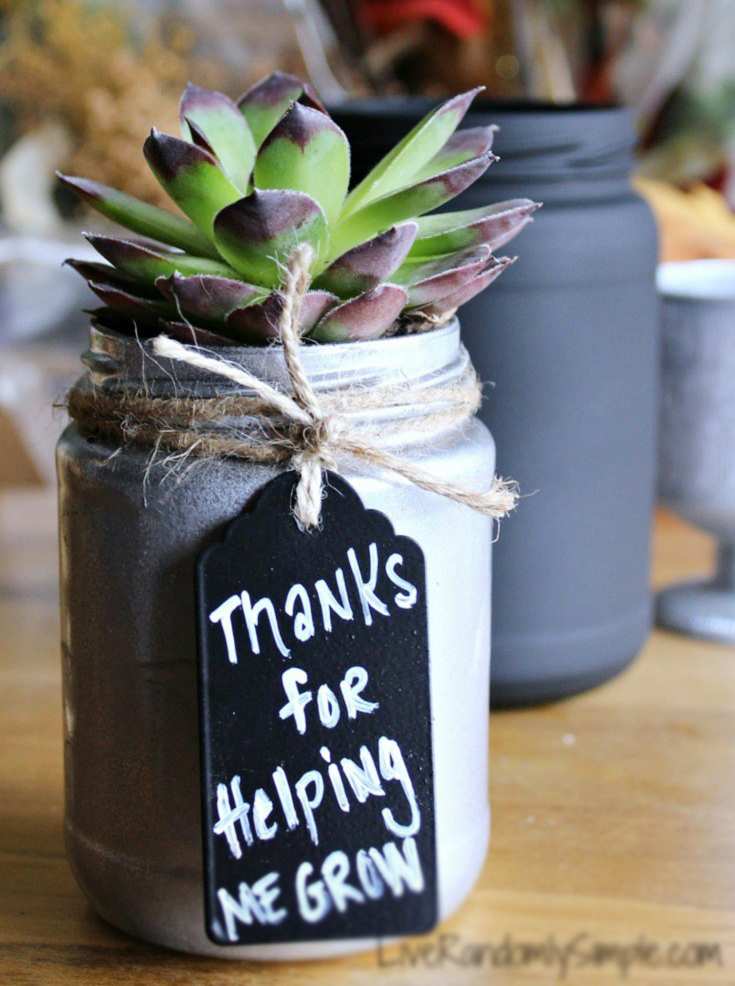
2. PLANTER GIFT
Source: LiveRandomlySimple.com
If your mom has a passion for growing plants, this DIY gift suits you. You can get her the plant she admires and be creative. Surely moms would love this lasting gift.
Materials:
> spray paint
> newspaper
> mason jars
> twine or yarn
> paper tags
> succulent plant
> soil
> sharpie (optional)
> clear gloss varnish (optional)
Procedure:
- on a newspaper, you can start coating your jar with spray paint to any desired designs. Make sure that you flip the jar over before coating to avoid any spray paint inside the jar. Let it dry.
- you can decorate your jar using a sharpie and you can draw or write anything on it.
- you can spray or paint your jar with clear gloss varnish to make the design last permanently
- in a paper tag, you can write a message for your mom and attach this with the twine.
- knot the twine around the neck of the jar
- fill the jar with soil
- carefully place your desired succulent plant inside the jar. Make sure to handle the plant with care as some plants are fragile.
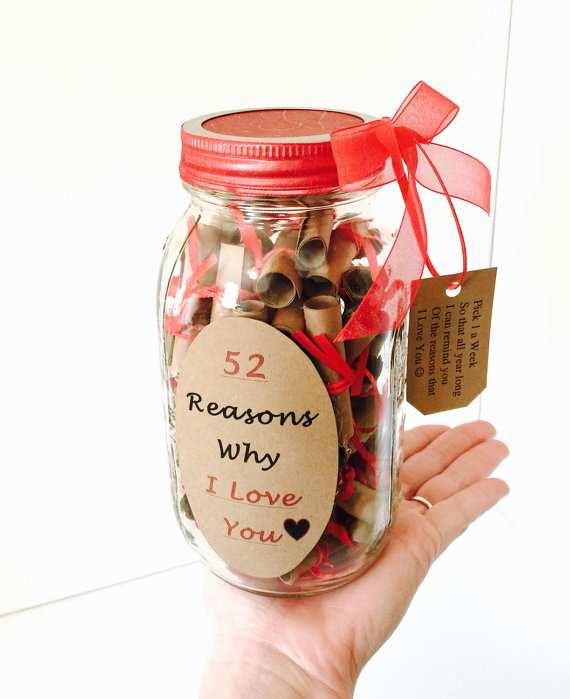
- JAR OF LOVE
Source: Pinterest.com
Mom would love to hear how much you love them. If you can’t tell your mom how much you love her, you try writing it on pieces of paper. This would surely bring sunshine to her already busy day while she reads your sweet messages.
Materials:
> mason jar or any jar
> yarn
> craft papers
> color pens
> scissors
> tape
> spray paint (optional)
> sharpie (optional)
> glue gun and glue stick (optional)
Procedure:
- coat your mason jar with spray paint to decorate or you can live it plain and simple.
- cut out a piece of paper that would perfectly fit into the top cover of the jar
- write 52 reasons why you love your mom on the paper and stick it inside the jar
- you can stick the paper on top of the cover if you want
- cut out craft papers into strips. You can use different colors for your paper strips
- write on the strips of paper your 52 reasons why you love your mom, you can be creative on this.
- when you are done writing you can roll the note and seal it with a tape. Make sure that you don’t seal it tightly. We all want to make sure that your mom would get to read your note.
- tie a yarn on your rolled note to decorate
- do this procedure until you have finished your 52 reasons
- place these notes inside the jar
4. PILL BOX
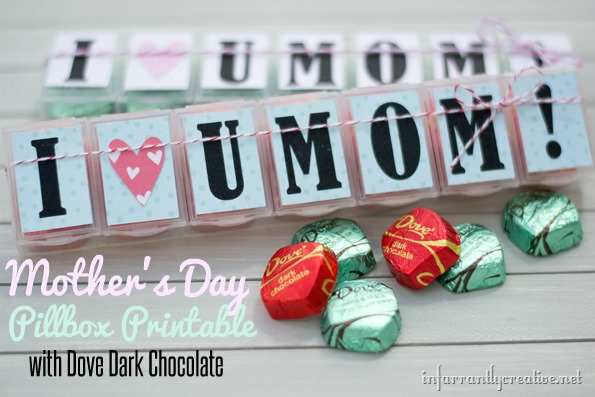
Source: infarrantlycreative.net
Pamper your Mom with chocolates or candy by personalizing a pill box for her.
Materials:
> pill box
> goodies (chocolates or candies)
> craft papers
> color pens / sharpie (optional)
> double-sided tape
> scissors
> twine (optional)
Procedure:
- in a piece of craft paper, you can write “ I ❤ U MOM!” on it. You can also have a little help with your computer and print this one out. Make sure to put spaces between each letter. The size of each letter should perfectly fit on the container of the pill box.
- cut out the letters
- stick one letter on top of each box using a double-sided tape to cover what is written on top of the pill box
- on another craft paper, write or print any quotes about being a mother. Make sure to consider the size of each box so that your phrases will fit inside the pill box.
- cut out the phrases
- place the cut outs inside
- fill each slot with a chocolate or candy that your mom likes
- you can also print pictures of you and your mom into little sizes
- stick them on the inside cover of the pill box with a double-sided tape
- tie the pill box with a twine if you want, when presenting this to your mom
5. MOM MUGS

Source: Pinterest.com
If your mom loves drinking coffee you can be creative when giving her a cup of coffee.
- Materials:
> coffee mug ( preferably white)
> paint brush
> stickers
> acrylic paint
Procedure:
- wash and dry the mug
- place the stickers on top of the surface of the mug. You can decide on what word you want to print on the mug, you can also put her initials on it.
- paint the mug with your desired design. You can do polka dots if you want using various color paints. Make sure not to over do the painting and avoid the lip area
- pull off the stickers from the mug while the paint is still wet and let the mug dry
- to set your artwork you can bake the mug by placing it inside a cool oven. Turn the oven on to 350°C and bake for 30 minutes. Turn the oven off and leave the mug inside. Get the mug once the oven cools down.
- To make your mug to last longer, only do hand washing.

No Comments